준비물
- Node.js
- node-telegram-bot-api
- telegram account
1. 봇의 아버지에게 귀중한 자식하나만 빌려줍쇼 부탁하기.
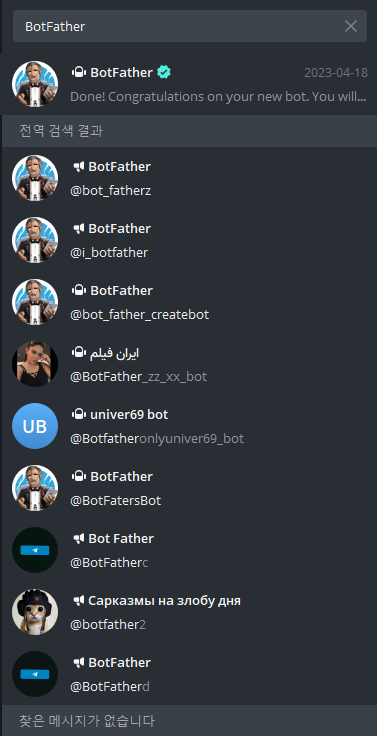
검색창에 BotFather 를 검색하면 봇아버지가 등장한다.
우리는 봇을 하나 받으면 된다. /newbot을 입력하면 봇의 이름을 설정하라고 한다. (그 외의 메뉴얼)

이름은 꼭 bot 혹은 Bot으로 끝나야한다!
이제 부여된 API Token을 사용해서 다양한 기능을 이용할 수 있다.
2. Node.js 구성
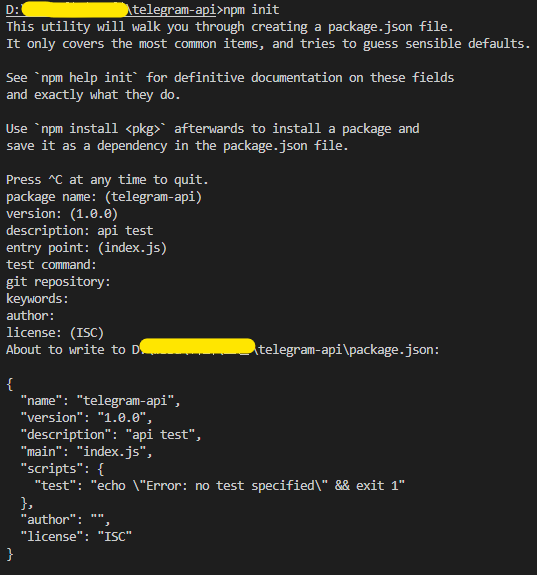
우선 npm init 으로 프로젝트를 초기화 해준다.
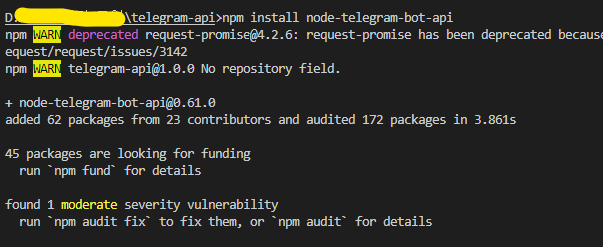
그 다음 node-telegram-bot-api 를 설치해준다. (자세히 나온 곳)
npm install node-telegram-bot-api
문서에서 제공해주는 예시 코드가 있다. (/echo 문자열 을 입력하면 받은 문자열을 보내주는 코드)
token 에 BotFather에게 받은 API Token 을 입력한다.
const TelegramBot = require('node-telegram-bot-api');
// replace the value below with the Telegram token you receive from @BotFather
const token = 'YOUR_TELEGRAM_BOT_TOKEN'; // << 봇퐈더에게 받은 토큰 입력하기
// Create a bot that uses 'polling' to fetch new updates
const bot = new TelegramBot(token, {polling: true});
// Matches "/echo [whatever]"
bot.onText(/\/echo (.+)/, (msg, match) => {
// 'msg' is the received Message from Telegram
// 'match' is the result of executing the regexp above on the text content
// of the message
const chatId = msg.chat.id;
const resp = match[1]; // the captured "whatever"
// send back the matched "whatever" to the chat
bot.sendMessage(chatId, resp);
});
// Listen for any kind of message. There are different kinds of
// messages.
bot.on('message', (msg) => {
const chatId = msg.chat.id;
// send a message to the chat acknowledging receipt of their message
bot.sendMessage(chatId, 'Received your message');
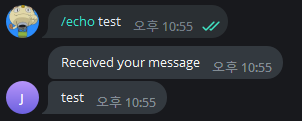
});작상한 코드를 실행시킨 후 봇에게 /echo test를 보내면!!
더 많은 api를 다루려면 문서를 참고하자 : )